Let’s start with some context. Why am I writing this post?
I work at Fourthline, a company that manages the Know Your Customer (KYC) process for companies like Revolut, TradeRepublic, and N26.
For those who don’t know what KYC is, think of when you register online to use one of these services and are asked to take a selfie and a picture of your ID document to prove you are who you claim to be.
That’s KYC in a nutshell, and as you may guess, we don’t want fraudsters to slip through. If you’ve ever played Papers, Please, you can imagine this isn’t always easy.
Fraudsters are getting better, and technology is helping them.
Deepfakes and AI-generated selfies and documents have become some of their tools, and my job at Fourthline is also to fight this kind of AI.
Yes, I’m an AI engineer who fights AI. A sort of cyberwar destined to become even more challenging as technology advances.
But to fight deepfakes, I should also study how similar problems were handled in the past.
Image manipulation has existed for decades, long before generative models reached today’s quality.
So let’s go back to 2007 and talk about compression and Error Level Analysis (ELA).
Compression
Almost every image on the internet is compressed; handling uncompressed images everywhere would be too expensive.
Let’s look at an example.
I took an image with my camera with a resolution of 6000x4000.
Quick math: that’s 24,000,000 pixels. Every pixel stores information about color, and color in computer science is usually expressed with 8 bits.
To cover most colors, we need three channels — red, green, and blue — so every pixel carries 8 × 3 bits of information.
The weight of this image should be 6000 × 4000 × 8 × 3 = 576,000,000 bits, or 72 megabytes.
Instead, it weighs only 6 megabytes.
Why? JPEG compression.
JPEG compression and artifacts
JPEG is the most widely used image compression algorithm.
In simple terms, the algorithm works by removing parts of the image that are barely noticeable to the human eye. It has a parameter called quality that sets how aggressive the compression is.
A quality of 100% means very little is removed, while 1% means heavy information loss.
Because information is lost, the image content is altered in subtle ways. If you look at the single pixel values, you’ll notice differences. Depending on the chosen quality, these differences may be invisible to the eye but still exist.
These differences are a trace left by the JPEG compression, a sort of fingerprint. We call them artifacts.
Now the interesting part comes.
Since JPEG compression is applied to the entire image, these artifacts should always be consistent inside the image.
If the image is tampered with in some way - say an object is removed in Photoshop - this will affect the JPEG artifacts as well.
You would notice an inconsistency of these artifacts in the particular area of the image that was altered.
And this is exactly what ELA is based on.
Error Level Analysis
In 2007, Dr. Neal Krawetz introduced ELA (among other techniques) in his talk A Picture’s Worth….
The idea is simple:
- Take the image to analyze
- Compress it again with JPEG at a chosen quality - this will become a parameter of ELA
- Calculate the difference between the two images
The result is an ELA map to interpret.
The assumption here is that the image (or parts of it) was compressed with JPEG at some point.
Let’s use a toy example to explain how it works.
Toy example
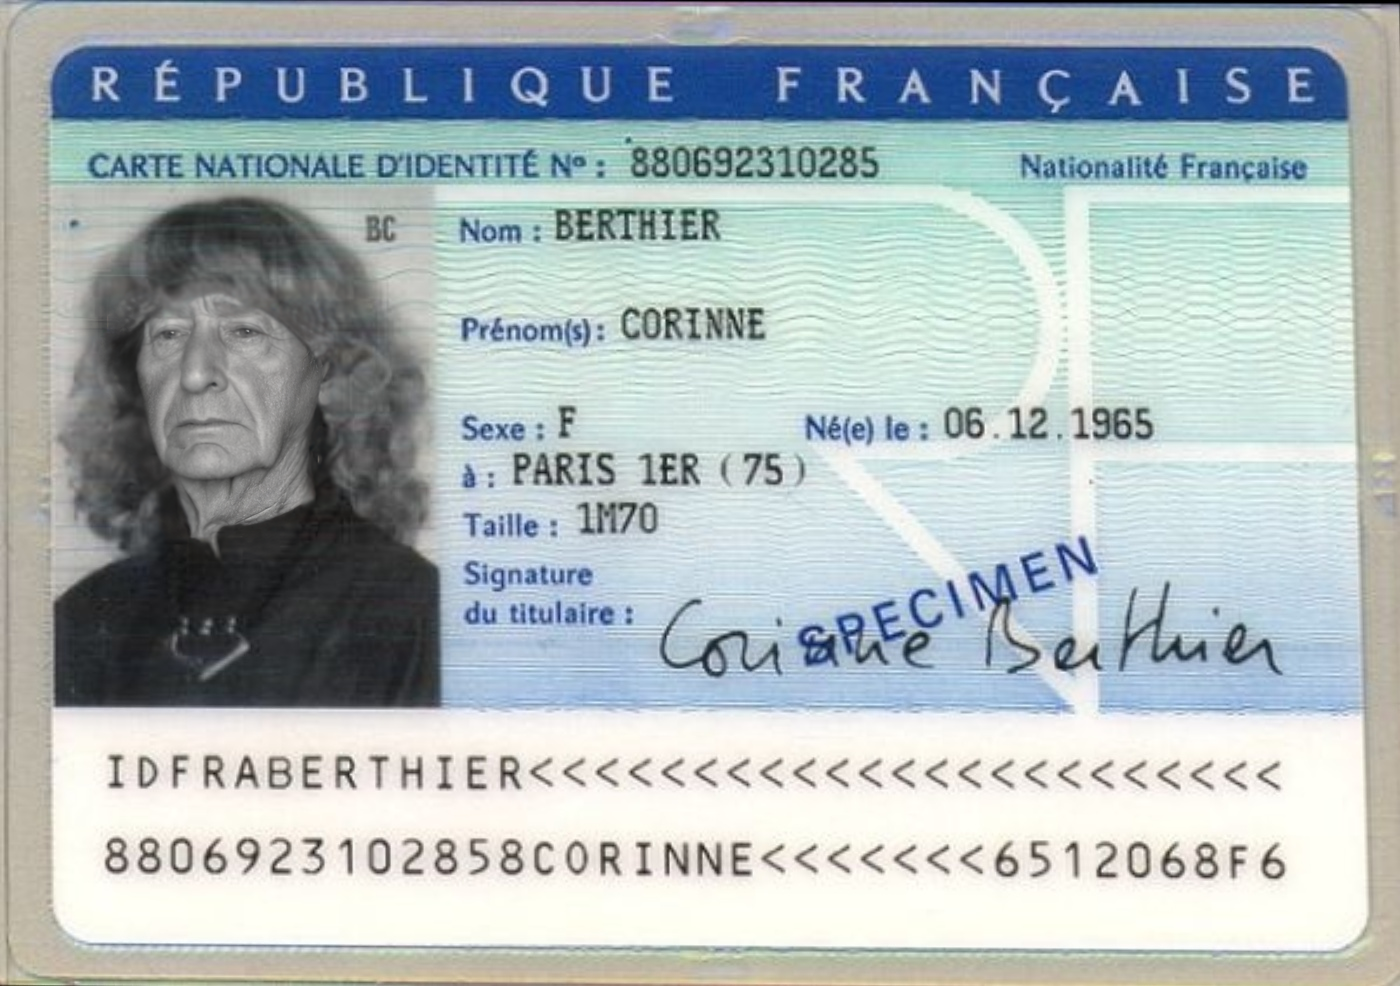
Using something from my domain of work, let’s consider this specimen of a French national ID card.

Suppose I know it was compressed at JPEG quality 95%. I’ll use that later.
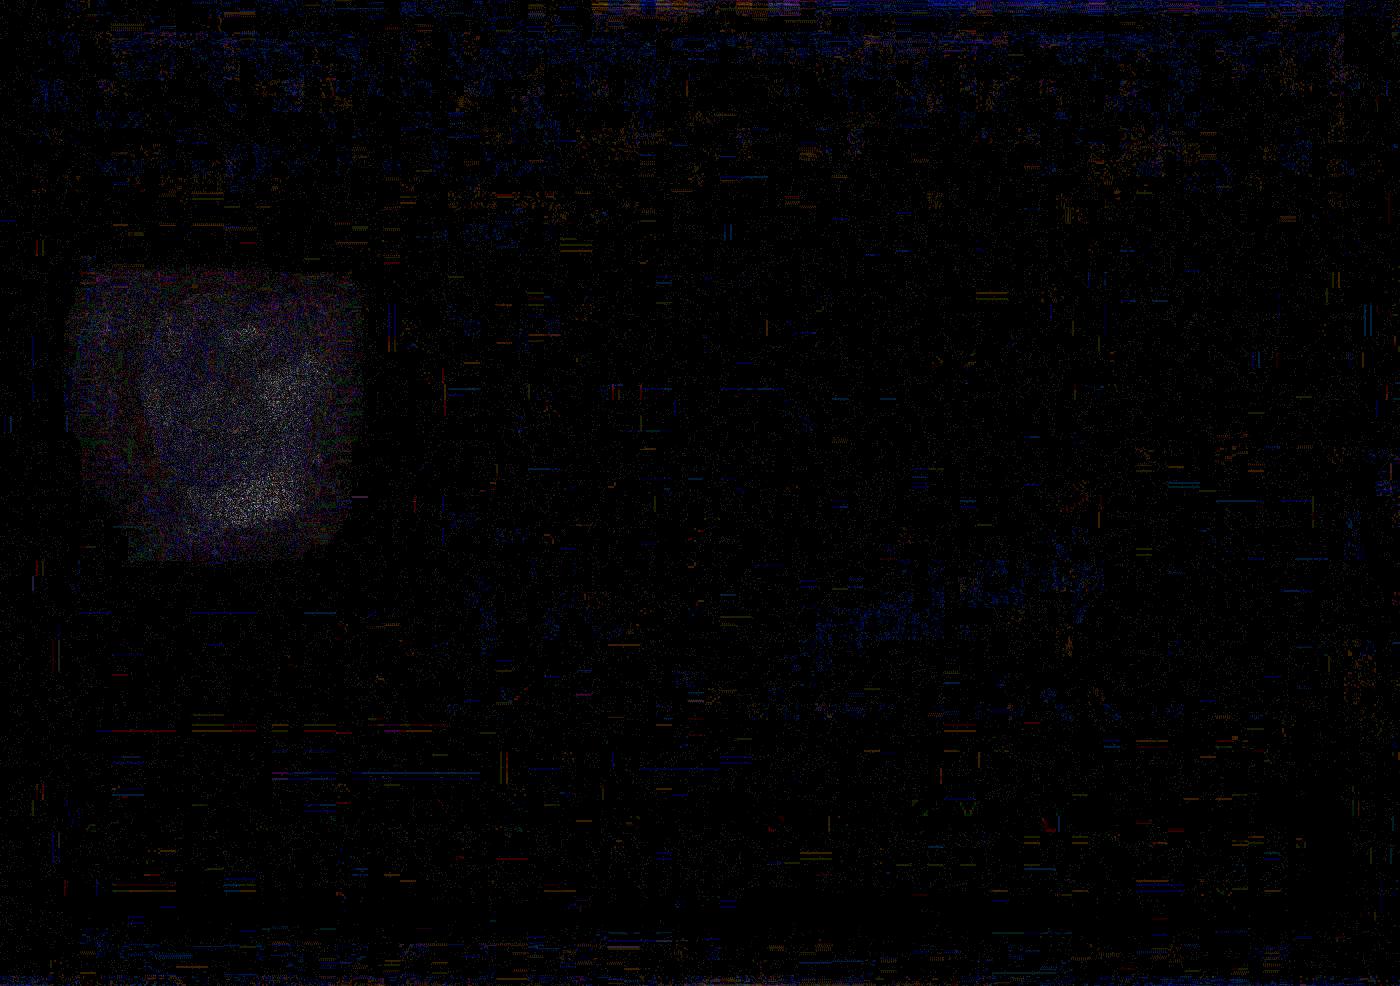
Now, I inpaint the image with an AI model and get this:
And, importantly, I save this deepfake in PNG format.
Unlike JPEG, PNG uses lossless compression, meaning no information is lost.
Now, using the information above, we perform ELA with a JPEG quality of 95%. In this way, the part of the image that was already compressed with the same quality factor should not produce any new artifact.
|
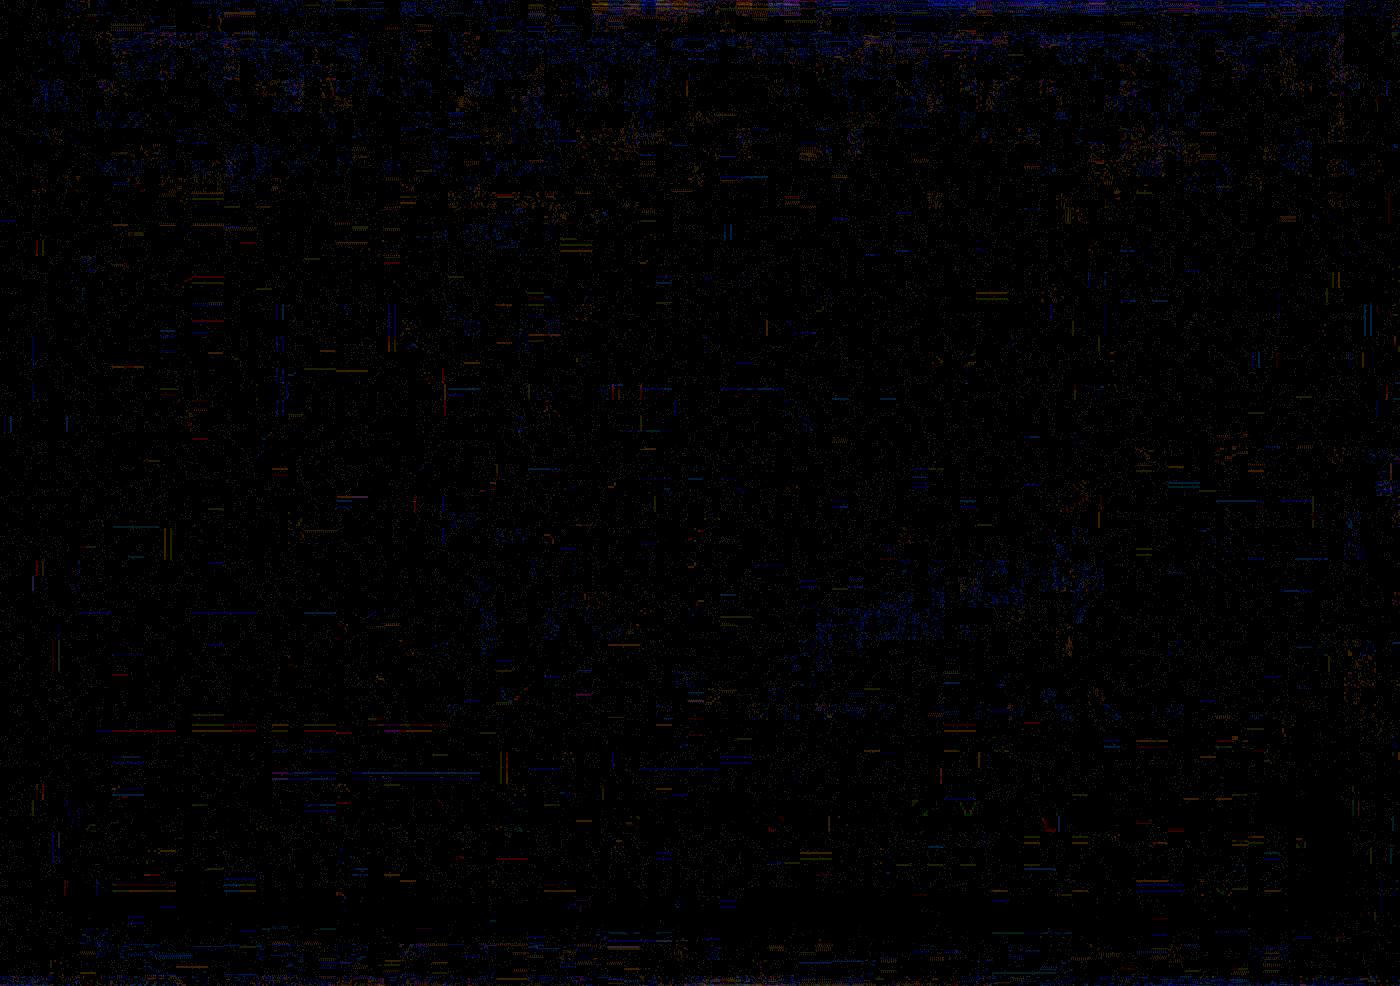 |
|---|---|
|
 |
The tampered area is obvious. We successfully detected the deepfake ID and blocked a fraudster.
But in reality, you may not know the original JPEG quality, and it’s unlikely that the manipulated image (previously a JPEG) would be saved as PNG.
Real example
Now let’s assume the deepfake was saved as JPEG.
We don’t know the quality factor. We only know that if the image was altered, part of it will be double-compressed and part single-compressed, producing inconsistency.
We perform ELA with JPEG quality 80% for both images.
|
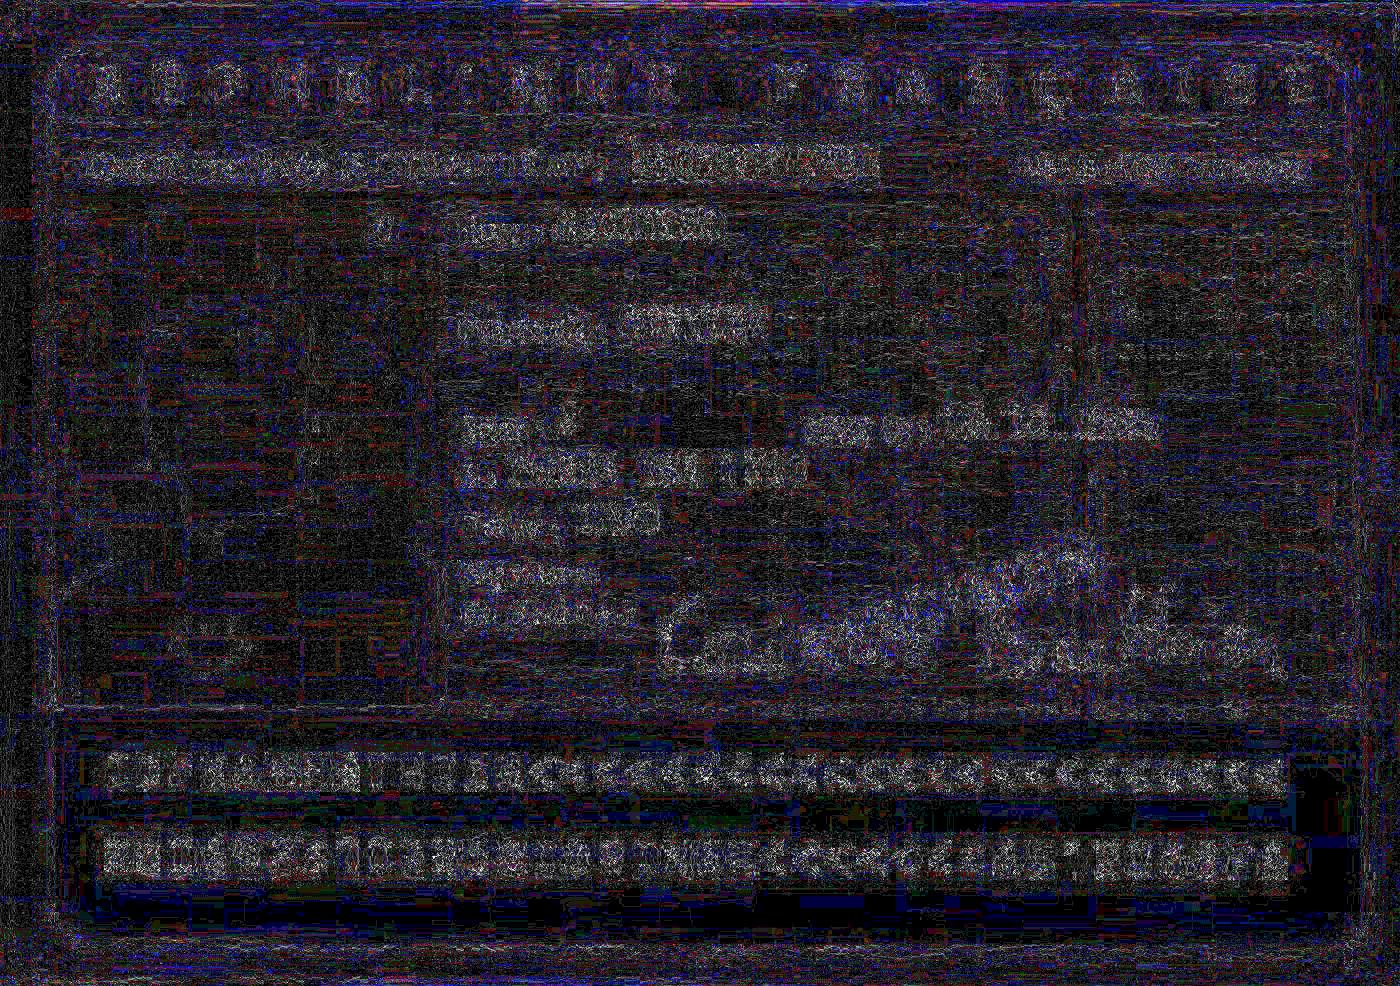 |
|---|---|
|
 |
Now ELA feels more like art.
There’s a clear difference, but without knowing tampering occurred, could you detect it from the map alone?
To better understand how to interpret an ELA map, we can take some notes from how JPEG works:
- JPEG creates more artifacts in high-contrast areas (like text or borders), making ELA brighter there.
- Flat surfaces should have uniform ELA values.
- Similar textures should produce similar ELA.
If some part of the image doesn’t respect these ‘rules’, then it might be suspicious. Like the deepfaked face on the ID, with a suspiciously bright ELA.
For more tips, see FotoForensics and their tutorials.
Conclusions
So, can ELA be a solution to detect AI-manipulated images?
No, not by itself anyway.
ELA is just a tool in the Image Forensics toolbox that can help fight deepfakes.
But many other things can be used together with ELA, such as EXIF information, PRNU, PCA and so on.
And probably some of these techniques will be the topic for another post.